8 min readUpdated 6 October 2026
This guide walks you through your first set of product options in Everfield: a gift message box on a product page. You will build it, publish it, and then check that a customer's answer reaches your cart and your order. Allow about ten minutes.
Before you start, turn on the app embed in your theme. Nothing you publish here renders on the storefront without it — see Turn on the app embed.
What is an experience?
An experience is one set of fields plus the rules for where and how they show. You build it in Everfield, publish it, and the theme extension renders it on your storefront.
Two things are worth knowing before you build one:
- Where the answers go. Answers from a product-page experience are saved as line item properties, so they appear under the line item on the cart and on the order. Answers from a cart experience are saved as cart note attributes, which appear under Additional details on the order.
- The field Label is the key. Whatever you type into Label becomes the property name on the order, character for character. Rename a label later and future orders carry the new name, so pick the wording you want your packing slips to show before you go live.
There is no save or submit button inside the widget. On a product page, customers type their answers and the values attach to the cart when they click your theme's Add to cart button. On a cart experience the answers save themselves to the cart a moment after each keystroke, and clicking Check out runs one last validation and save.
Start from a template or from blank
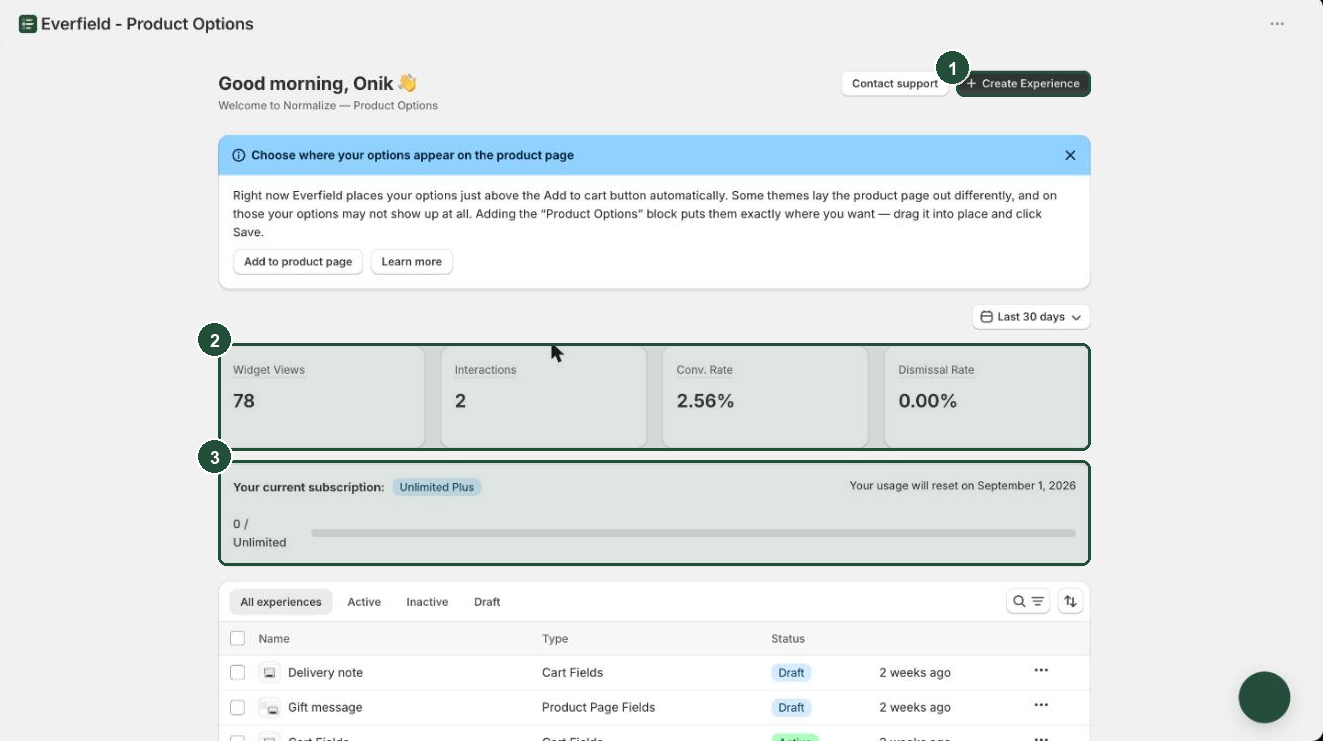
- Open Apps → Everfield - Product Options and click Create experience at the top right. The menu has two parts: Start from a template, with the four starter templates, and Start from scratch, with Product page fields and Cart fields. Each choice opens the builder, except a template your plan doesn't include, which opens Pricing (see below).
- The starter templates are Gift Message, Engraving, Photo Personalization and Delivery Instructions. All four are product-page experiences. Choose Gift Message to follow along with this guide — it opens with two fields already in place, Gift message (a Text area) and Recipient name (a Text field). The same templates are also on the full Create experience page, with a short description each: click Create experience on the Analytics, Help Center or Pricing page.
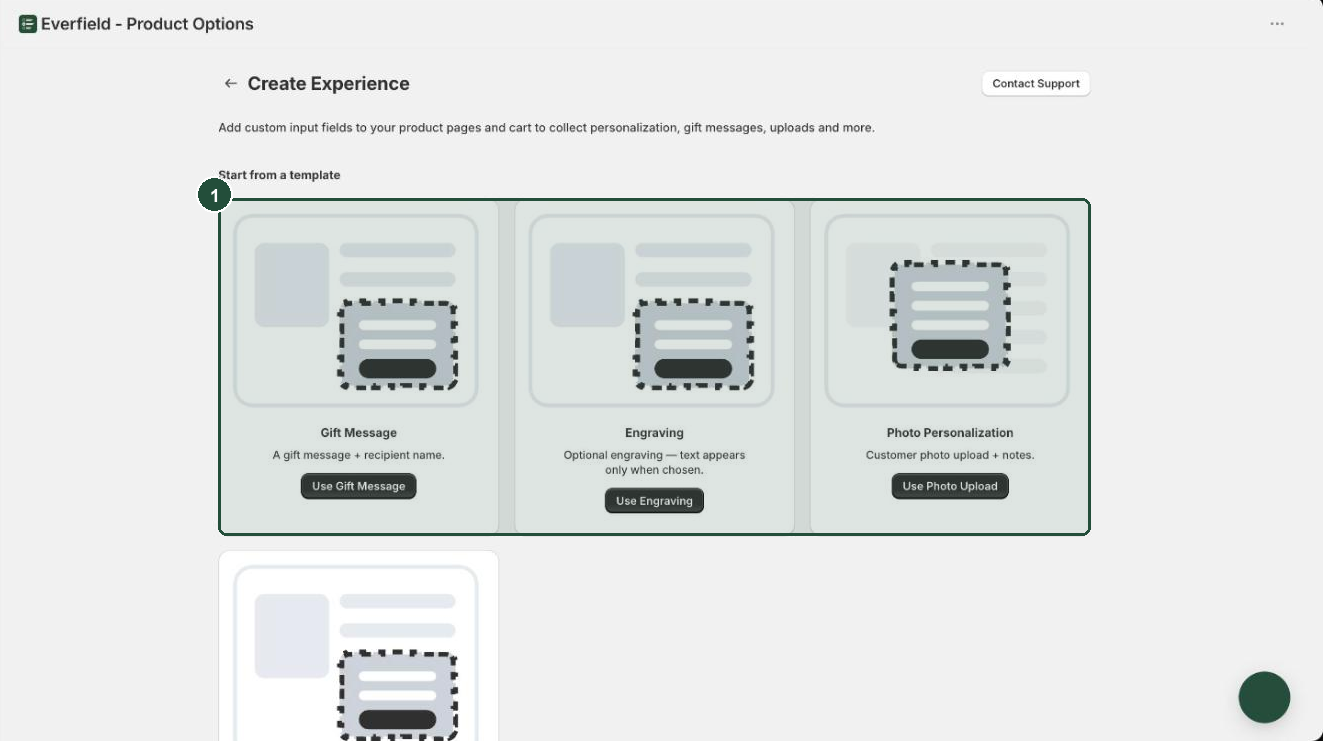
The Engraving template uses conditional logic, which needs the Basic plan or higher. On the Free plan it is badged with the plan it needs, in the dashboard menu and on the Create experience page, and choosing it sends you to the Pricing page instead of the builder. That is expected.
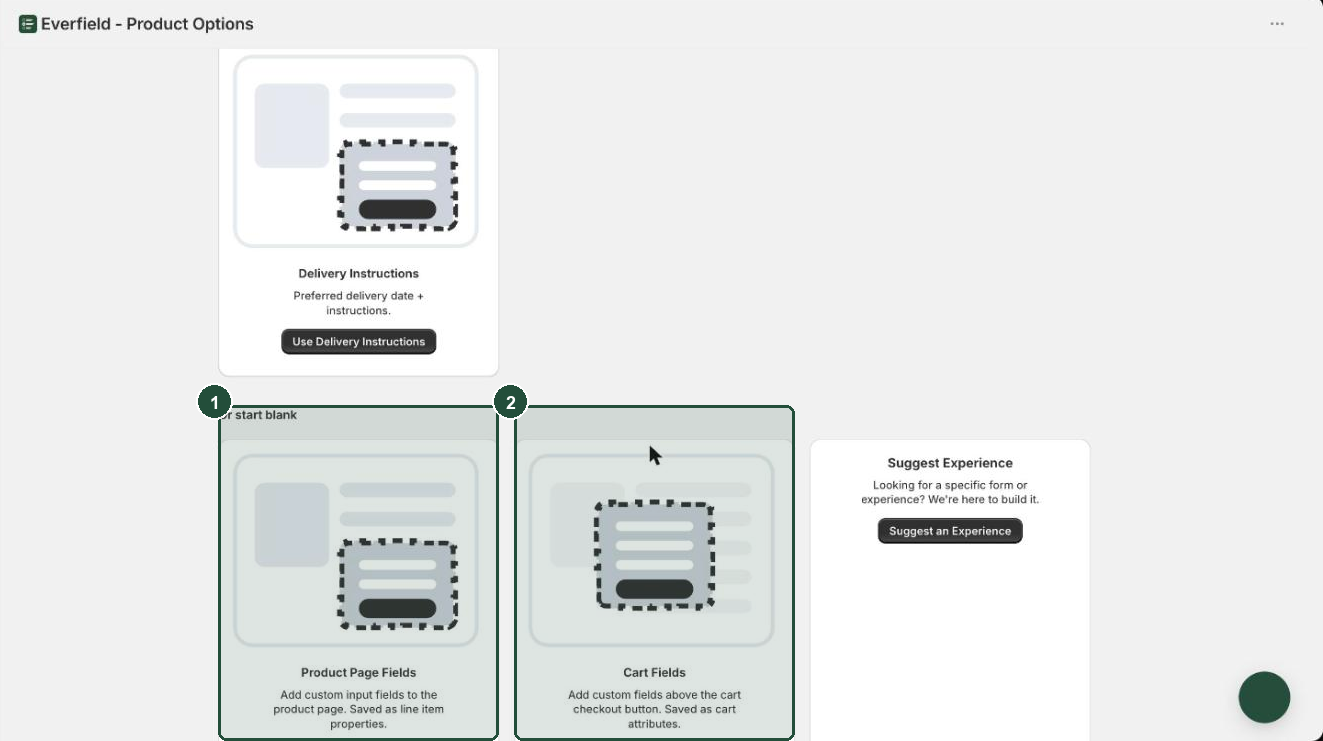
- To start with an empty experience instead, choose Product page fields or Cart fields under Start from scratch in the same menu. The Create experience page offers the same two under Or start blank. A blank product-page experience opens with a single Text field labelled Your message.
The builder opens with the experience name at the top left, a Draft badge beside it, and five tabs down the left: Placement, Fields, Templates, Style, Settings. The Templates tab holds style templates, which restyle your fields — not the starter templates you just came from. One caveat: while the experience still has nothing but the default field, that tab's button reads Apply template + example fields and applying it will swap your field list for the template's example fields. Once you have built fields of your own the button reads Apply template and leaves them alone. Type a name you will recognise on the dashboard: Gift message works for this run.
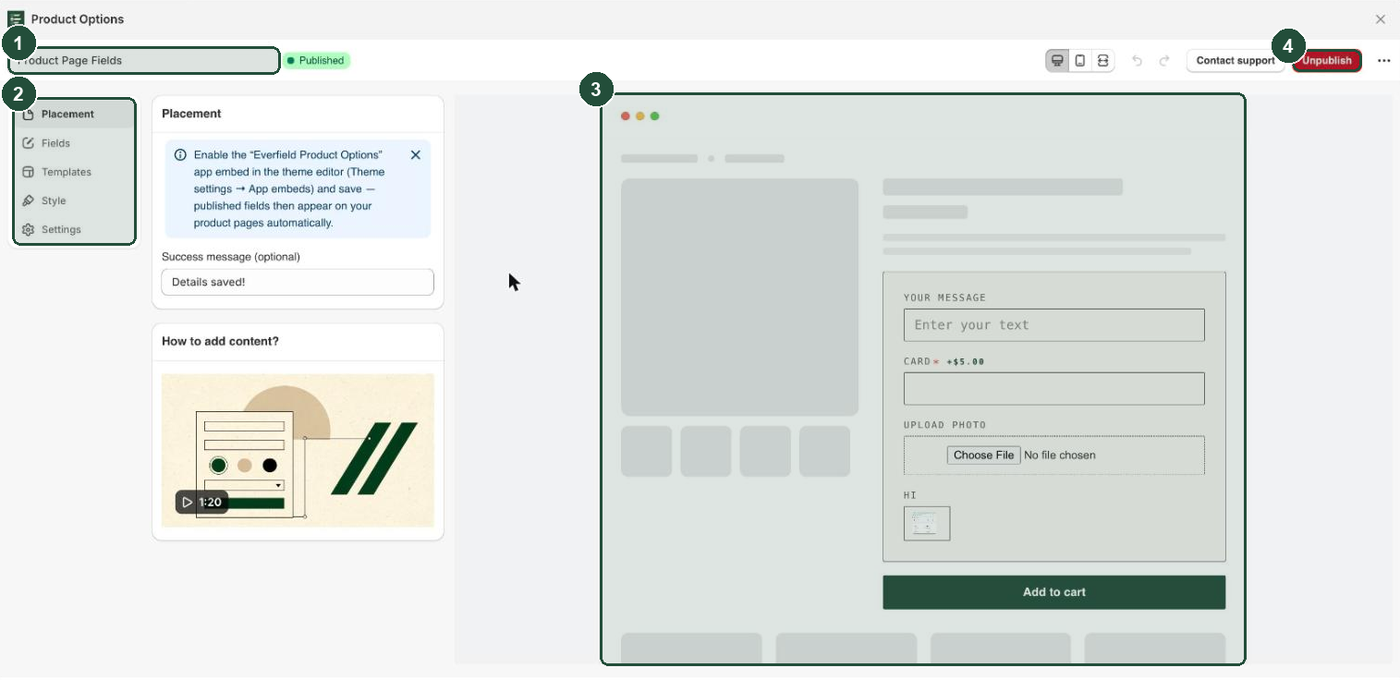
On a product-page experience the Placement tab has no positioning controls at all — placement is handled by the app embed or the Product Options block in your theme. The one box it does show, Success message (optional), is stored with your experience but is never displayed to customers, so nothing you type there will appear on your storefront.
Add and configure your fields
- Click the Fields tab. You will see the fields this experience already has. Click Add to add another, or drag a row by its handle to reorder. An experience can hold up to 20 fields.
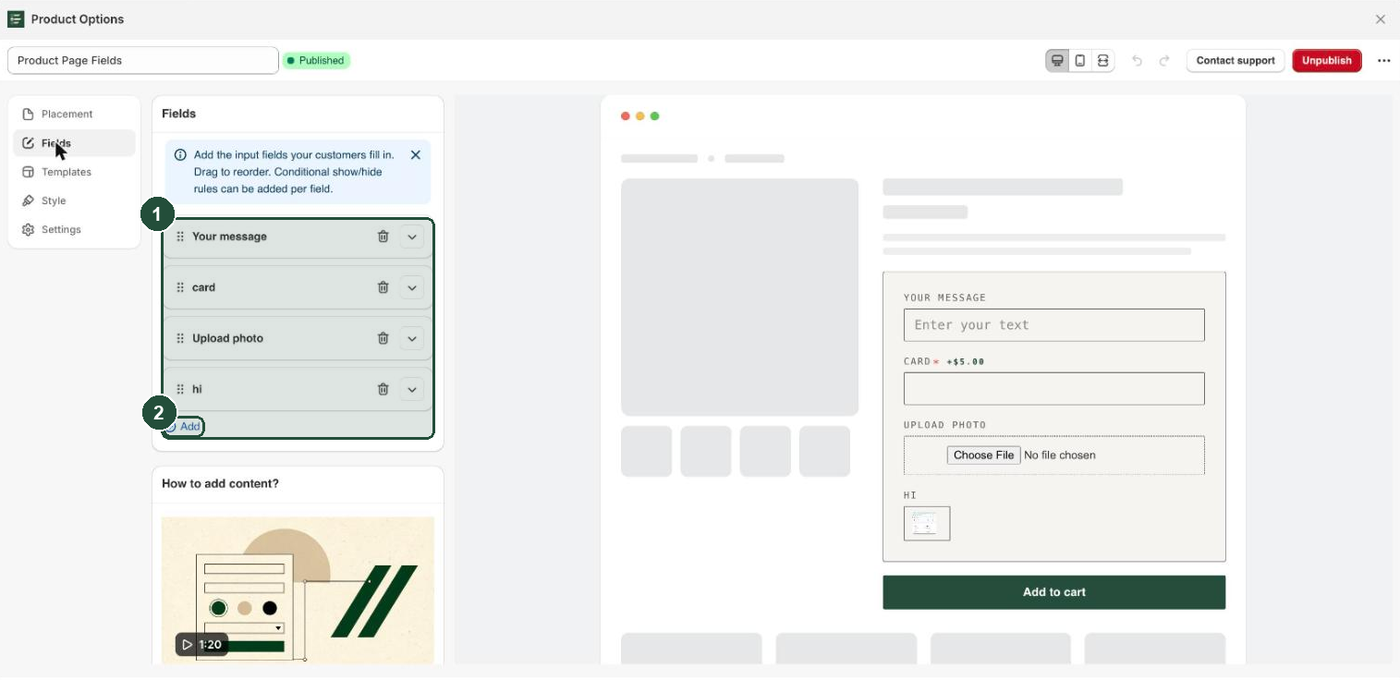
Click the chevron at the right of a field row to open its settings.
Pick a Field type. There are 20 to choose from: 14 that collect an answer (Text, Text area, Number, Quantity, Phone, Email, Date, Dropdown, Radio buttons, Swatch, Toggle / switch, File / image upload, Multiple choice, Product picker) and 6 display-only blocks that show information without collecting anything (Heading, Paragraph, Divider, Spacer, Custom HTML, Size chart). The settings below change to match the type you pick.
Set the Label. It is the only required setting, it is what the customer reads above the field, and it is the property name that lands on the order. For this run, use
Gift message.Fill in the optional settings you want. For a Text field these are Placeholder (shown inside the empty input), Help text (a hint under the field), Required, Add-on price, Price per character, Minimum characters, Maximum characters and Show character counter. Set Help text to
We'll write this on the gift card.
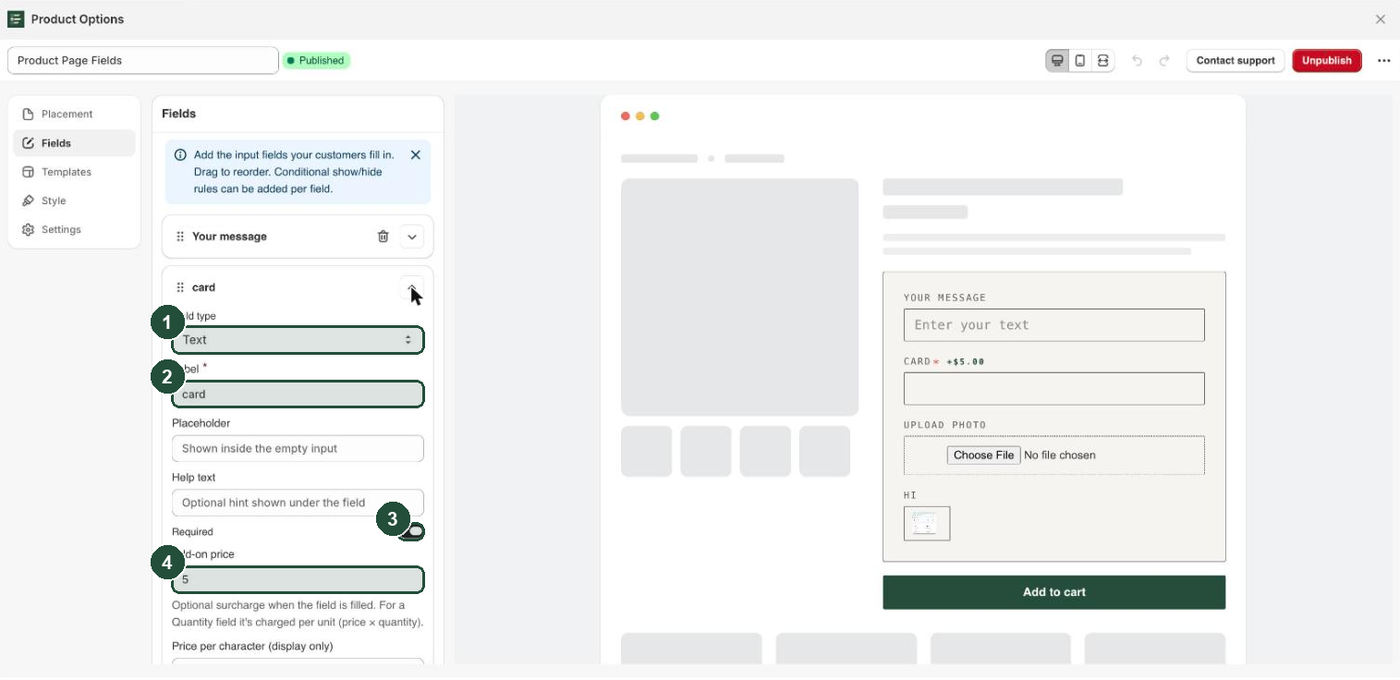
Required is off by default. Turning it on blocks add to cart until the field is filled — the customer sees "This field is required." next to it. Add-on price is an optional surcharge for that field; leave it empty for your first run. Price per character charges for each character the customer types; leave it empty too.
Check it in the live preview
The right half of the builder is a live preview of a product page with your fields in place. It updates as you type, so you can read your labels and help text exactly as a customer will.
Use the three device buttons at the top right to switch the preview between desktop, mobile and full width. The Add to cart button in the preview is a mock: it shows where your fields sit relative to it and adds nothing to a cart.
Publish your experience
Click the primary button at the top right. While you have unsaved changes it reads Save.
Once your work is saved, the same button becomes Publish. The badge beside the name still reads Draft — a draft exists only inside Everfield and never appears on your storefront.
Click Publish. The badge changes to Published, the button becomes Unpublish, and a confirmation reads "Experience published successfully".
Close the builder. On the dashboard list your experience now shows the status Active, and with the app embed on, the Get Started checklist is done and disappears. If you leave an experience as a draft instead, the dashboard offers to publish it for you: a button named after the experience, such as Publish "Gift message", in the checklist or in a reminder above it. The status column uses Active for a published experience, Draft for an unpublished one and Inactive for one you have archived.
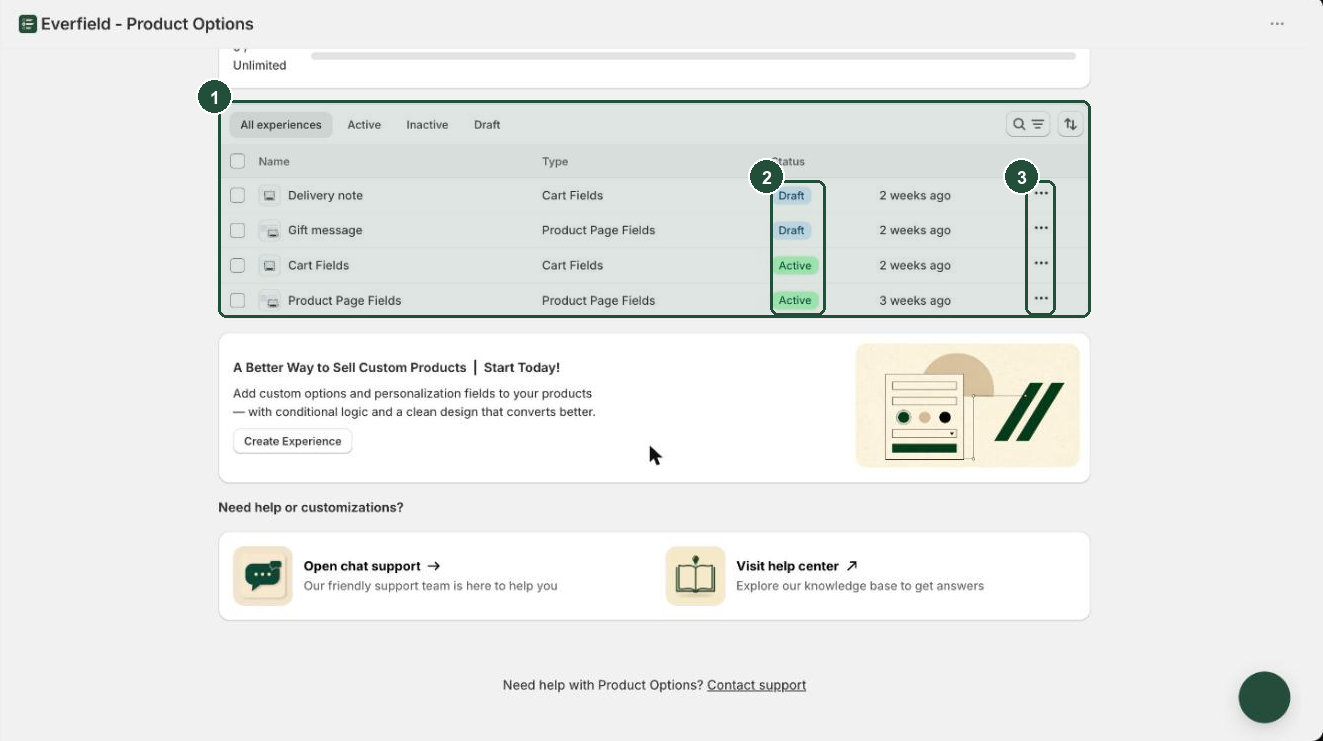
Two things to keep in mind:
- Only one published experience renders per placement. On any given page Everfield shows the first published product-page experience that passes its targeting rules, and the first published cart experience. A second published experience for the same placement will not appear alongside it. There is no stacking or ordering control.
- Editing a published experience only needs Save. It stays published and your storefront picks up the change. You do not have to publish again.
Test it on your storefront
- Open a product page on your storefront. Your fields appear in a bordered box just above the Add to cart button.
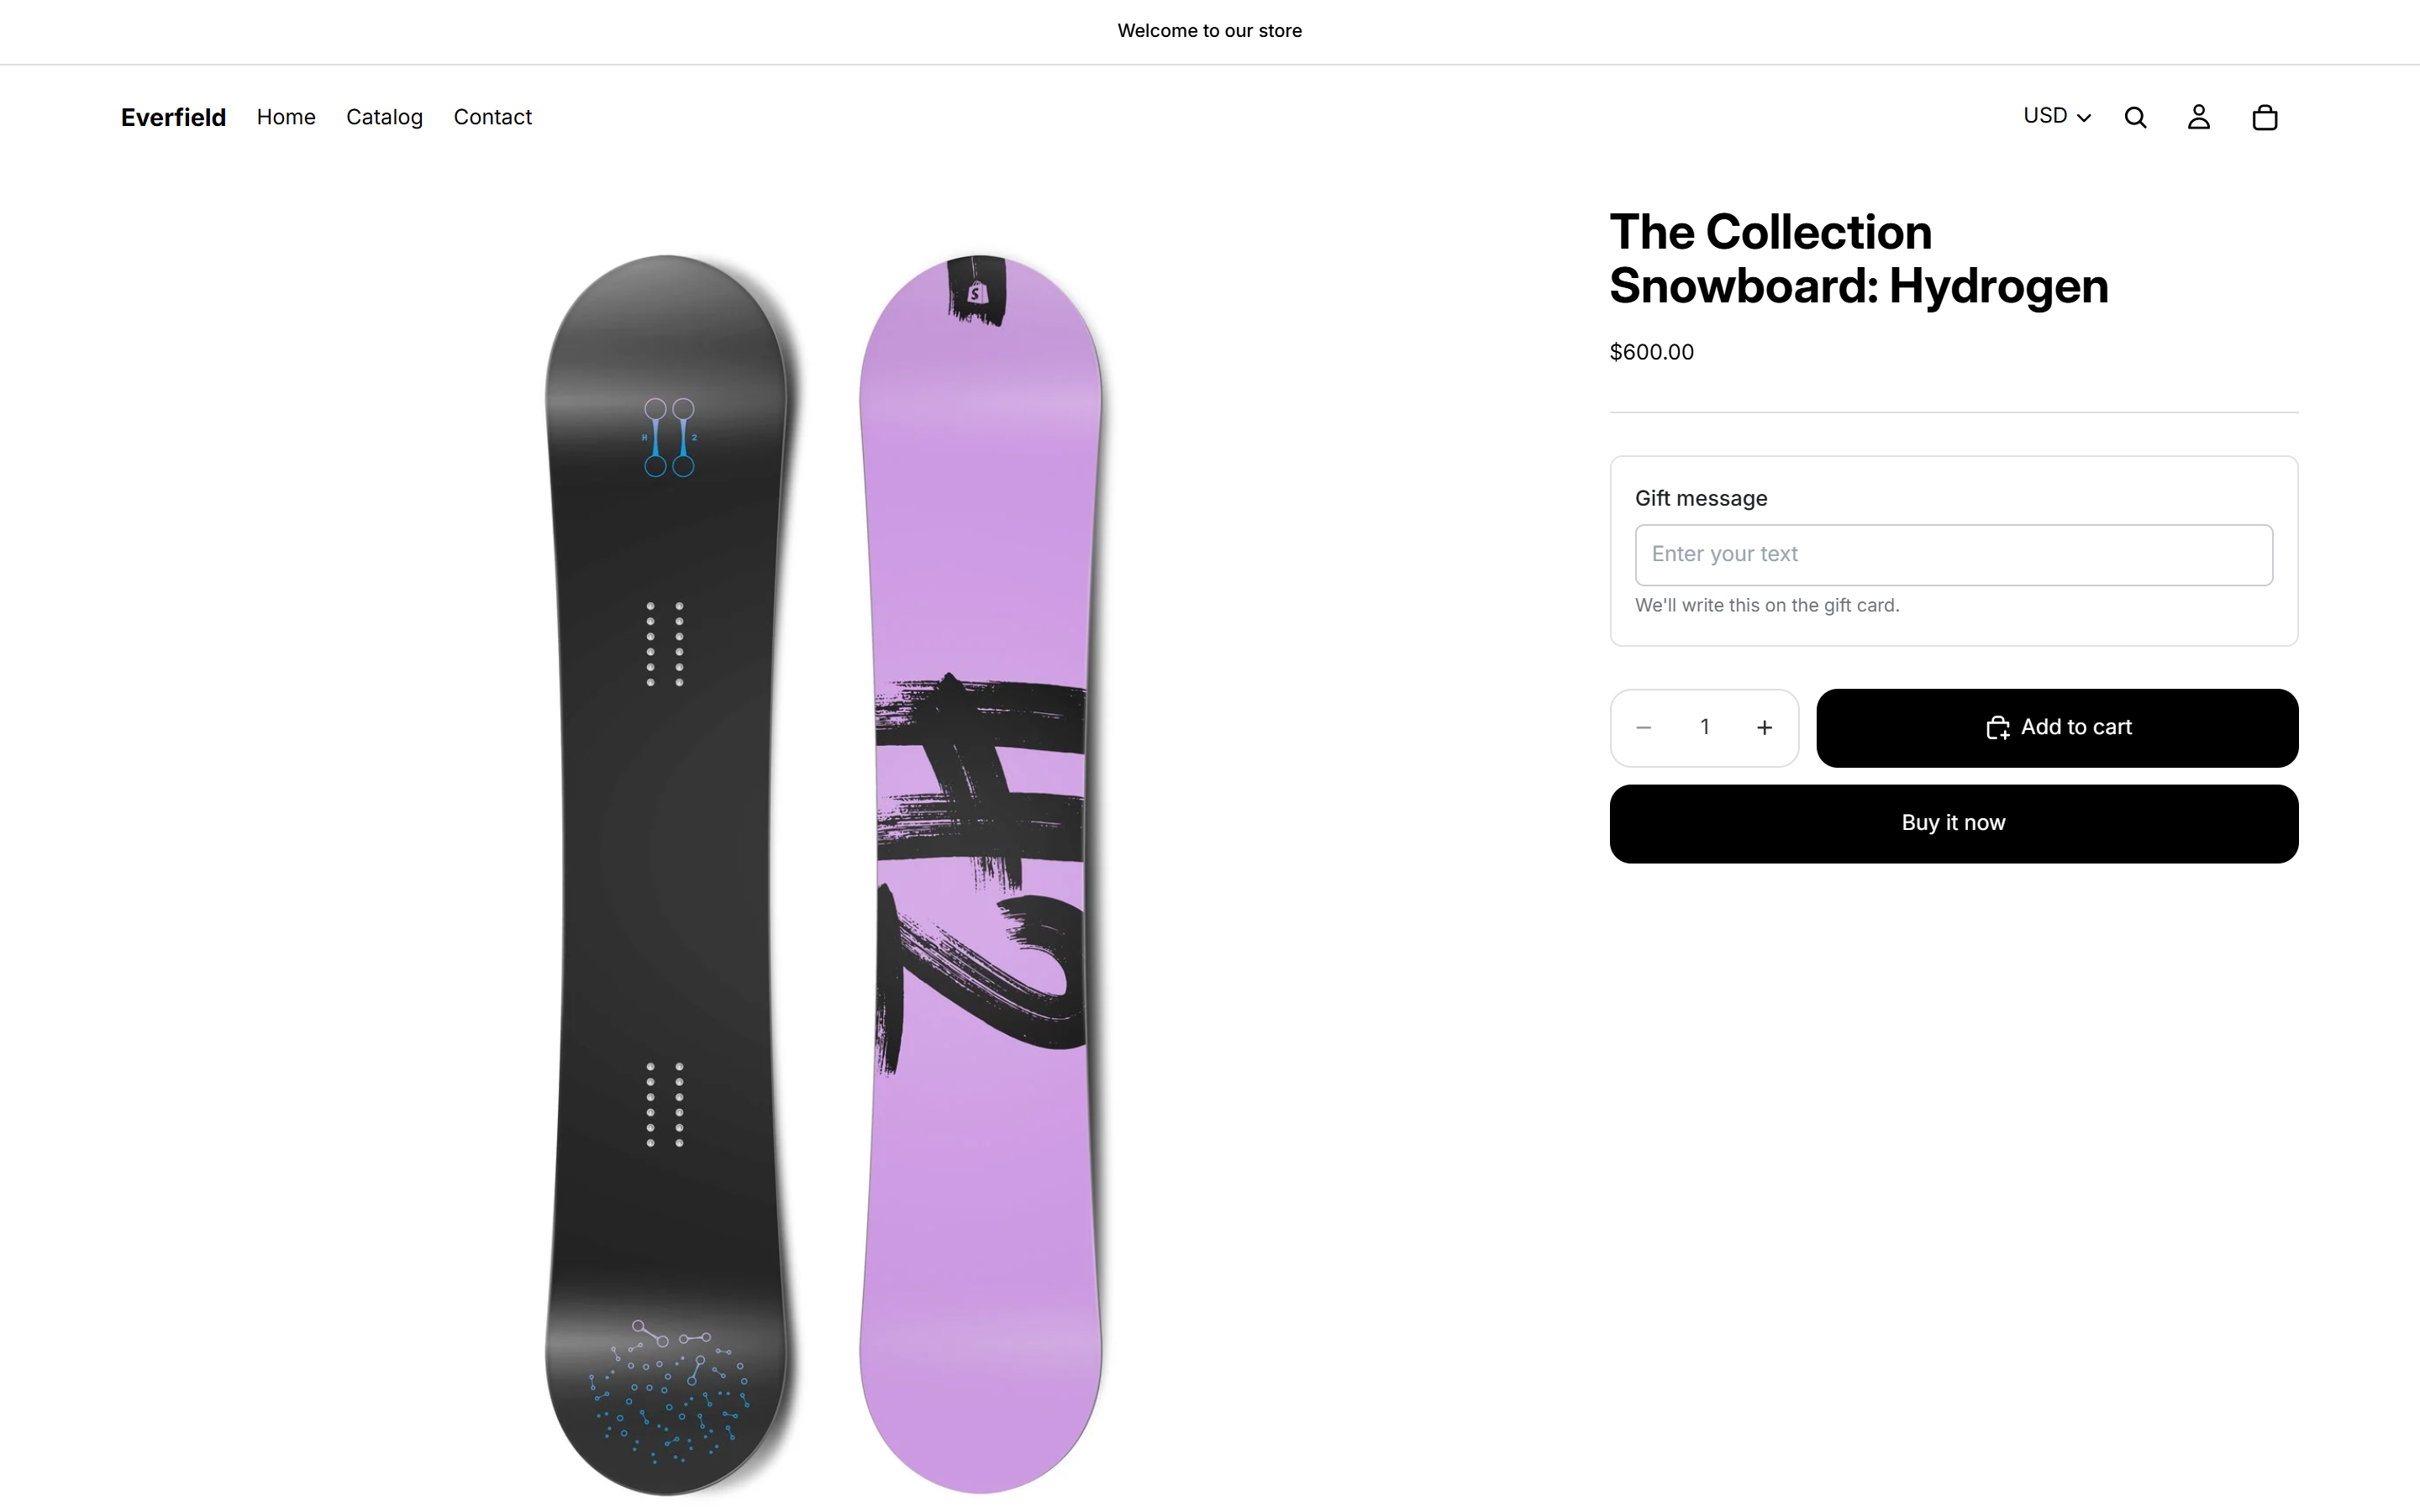
- Fill the field in as a customer would, then click Add to cart.
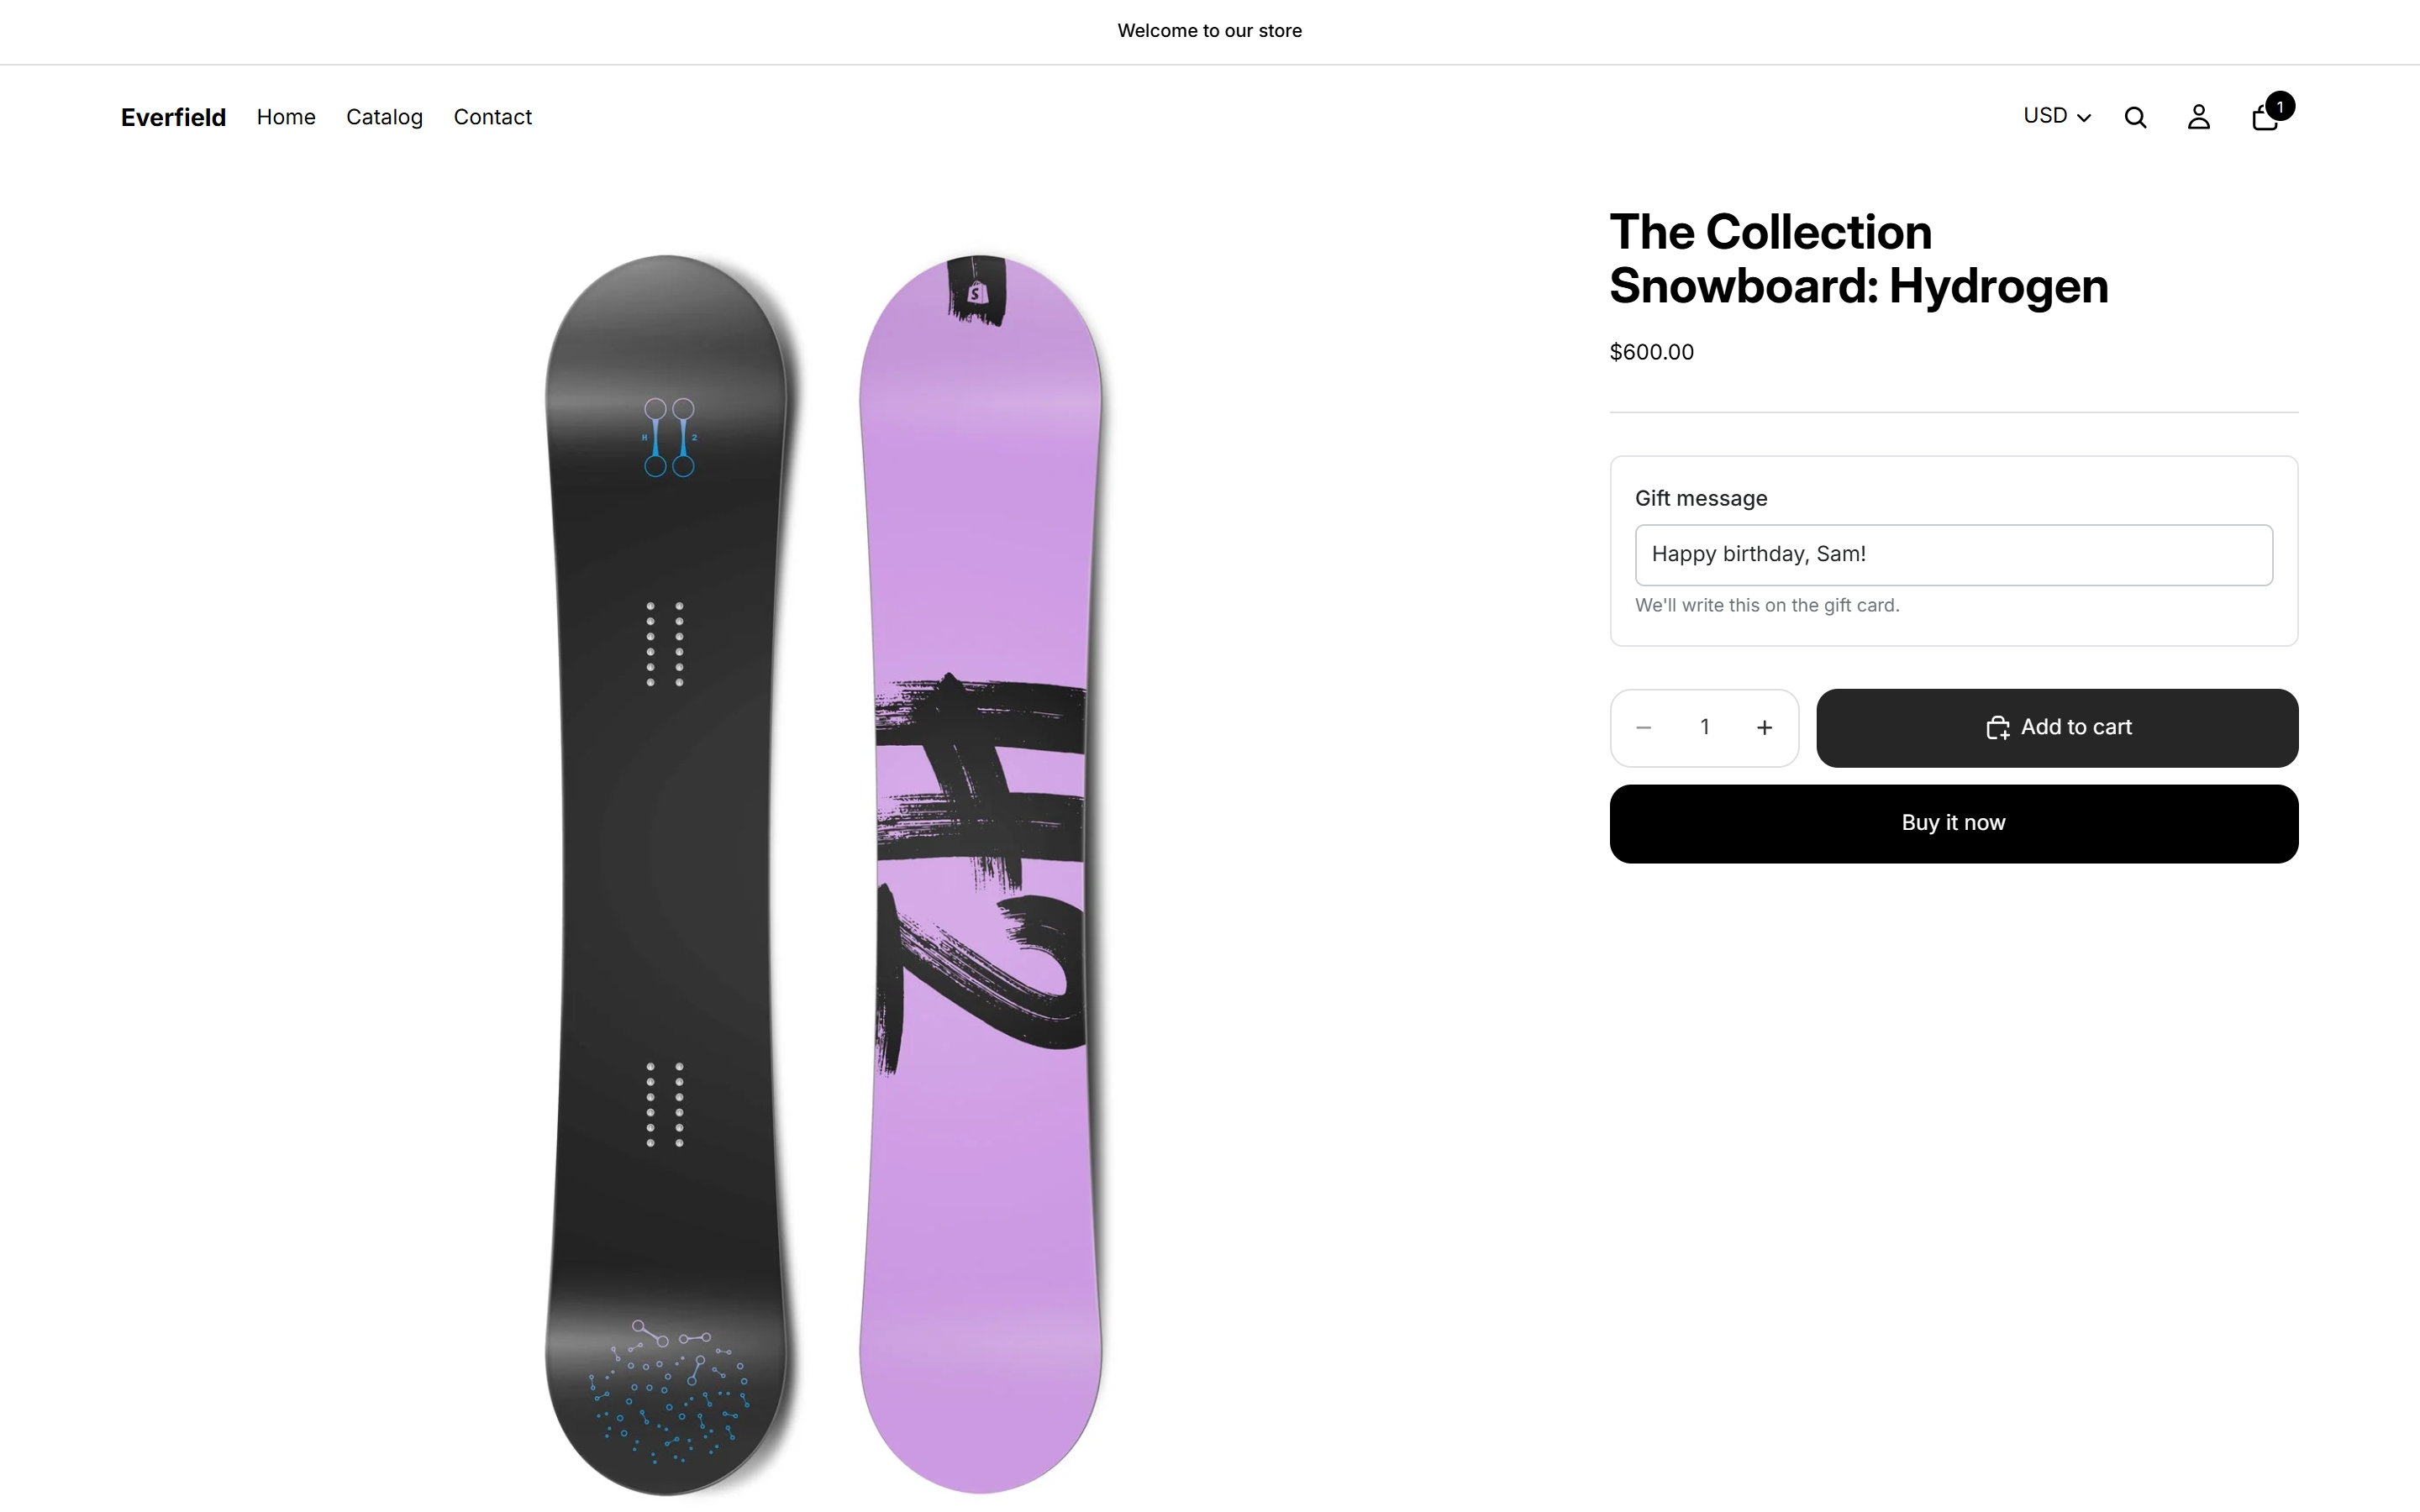
- Open the cart. The answer is attached to the line item and shown under the product name as
Gift message: Happy birthday, Sam!. It carries through to the order.

- Place a test order and open it in Shopify admin. The same label and value appear under the line item.
Troubleshooting
I saved but the badge still says Draft. Saving and publishing are separate actions. Saving stores your work in Everfield only. Click the primary button again — once your changes are saved it reads Publish.
I can't find the Save button. It only shows while you have unsaved changes. Once everything is saved the same button reads Publish, or Unpublish if the experience is already live.
It's published but nothing shows on my product page. Most often the app embed is off in your published theme — see Turn on the app embed. Otherwise, check that no other product-page experience is already published, because only the first match renders, and check the targeting rules on the Settings tab. The full checklist is in My options aren't showing.
The field shows, but Add to cart does nothing. A required field is empty or invalid, or a file is still uploading. Look for the red message under the field — "This field is required." or "Please wait for the upload to finish." Add to cart is blocked until it clears.
The answer isn't on the order. Empty fields are never saved, and a field hidden by a conditional rule is never saved either. If you renamed a field's Label after going live, orders placed since carry the new name and older orders keep the old one — the label is the property key.
My fields appear in an odd place on the product page. Everfield injects them into the theme's add-to-cart form, immediately above the first add-to-cart button it finds there — and if that form has no such button, at the very end of the form. Some themes lay that out differently. Add the Product Options block to your product template and drag it exactly where you want it. The steps are in Turn on the app embed.