9 min readUpdated 6 October 2026
A Cart Fields experience adds options to your Shopify cart page and to your slide-out cart drawer, directly above the checkout button. It suits anything that applies to the whole order — a delivery note, a preferred delivery date, packing instructions. Creating and publishing one takes about five minutes. Correcting its position on an unusual theme takes a few more.
Cart options versus product page options
Two things differ between the placements, and both matter before you build.
Where the answer ends up. A Product Page Fields experience saves each answer as a line item property on the product being added, so the answer travels with that one item. A Cart Fields experience saves answers as cart note attributes — order-level values covering the whole cart, not any single line. They appear against the order rather than against a product.
What you can charge. Product page experiences can charge for an option with Add-on price; Everfield collects the money by adding a hidden add-on variant to the cart as its own line, linked to the product line. Cart experiences cannot — the price controls are hidden on them, because the cart runtime only updates the cart, it never attaches an add-on line. If the option needs to cost something, build it as a product page experience instead.
Everything else is shared: the same field types, the same conditional rules, the same Templates, Style and Settings tabs.
Create a cart experience
On the dashboard, click Create experience, then under Start from scratch choose Cart fields. The other choice there, Product page fields, puts fields on product pages instead.
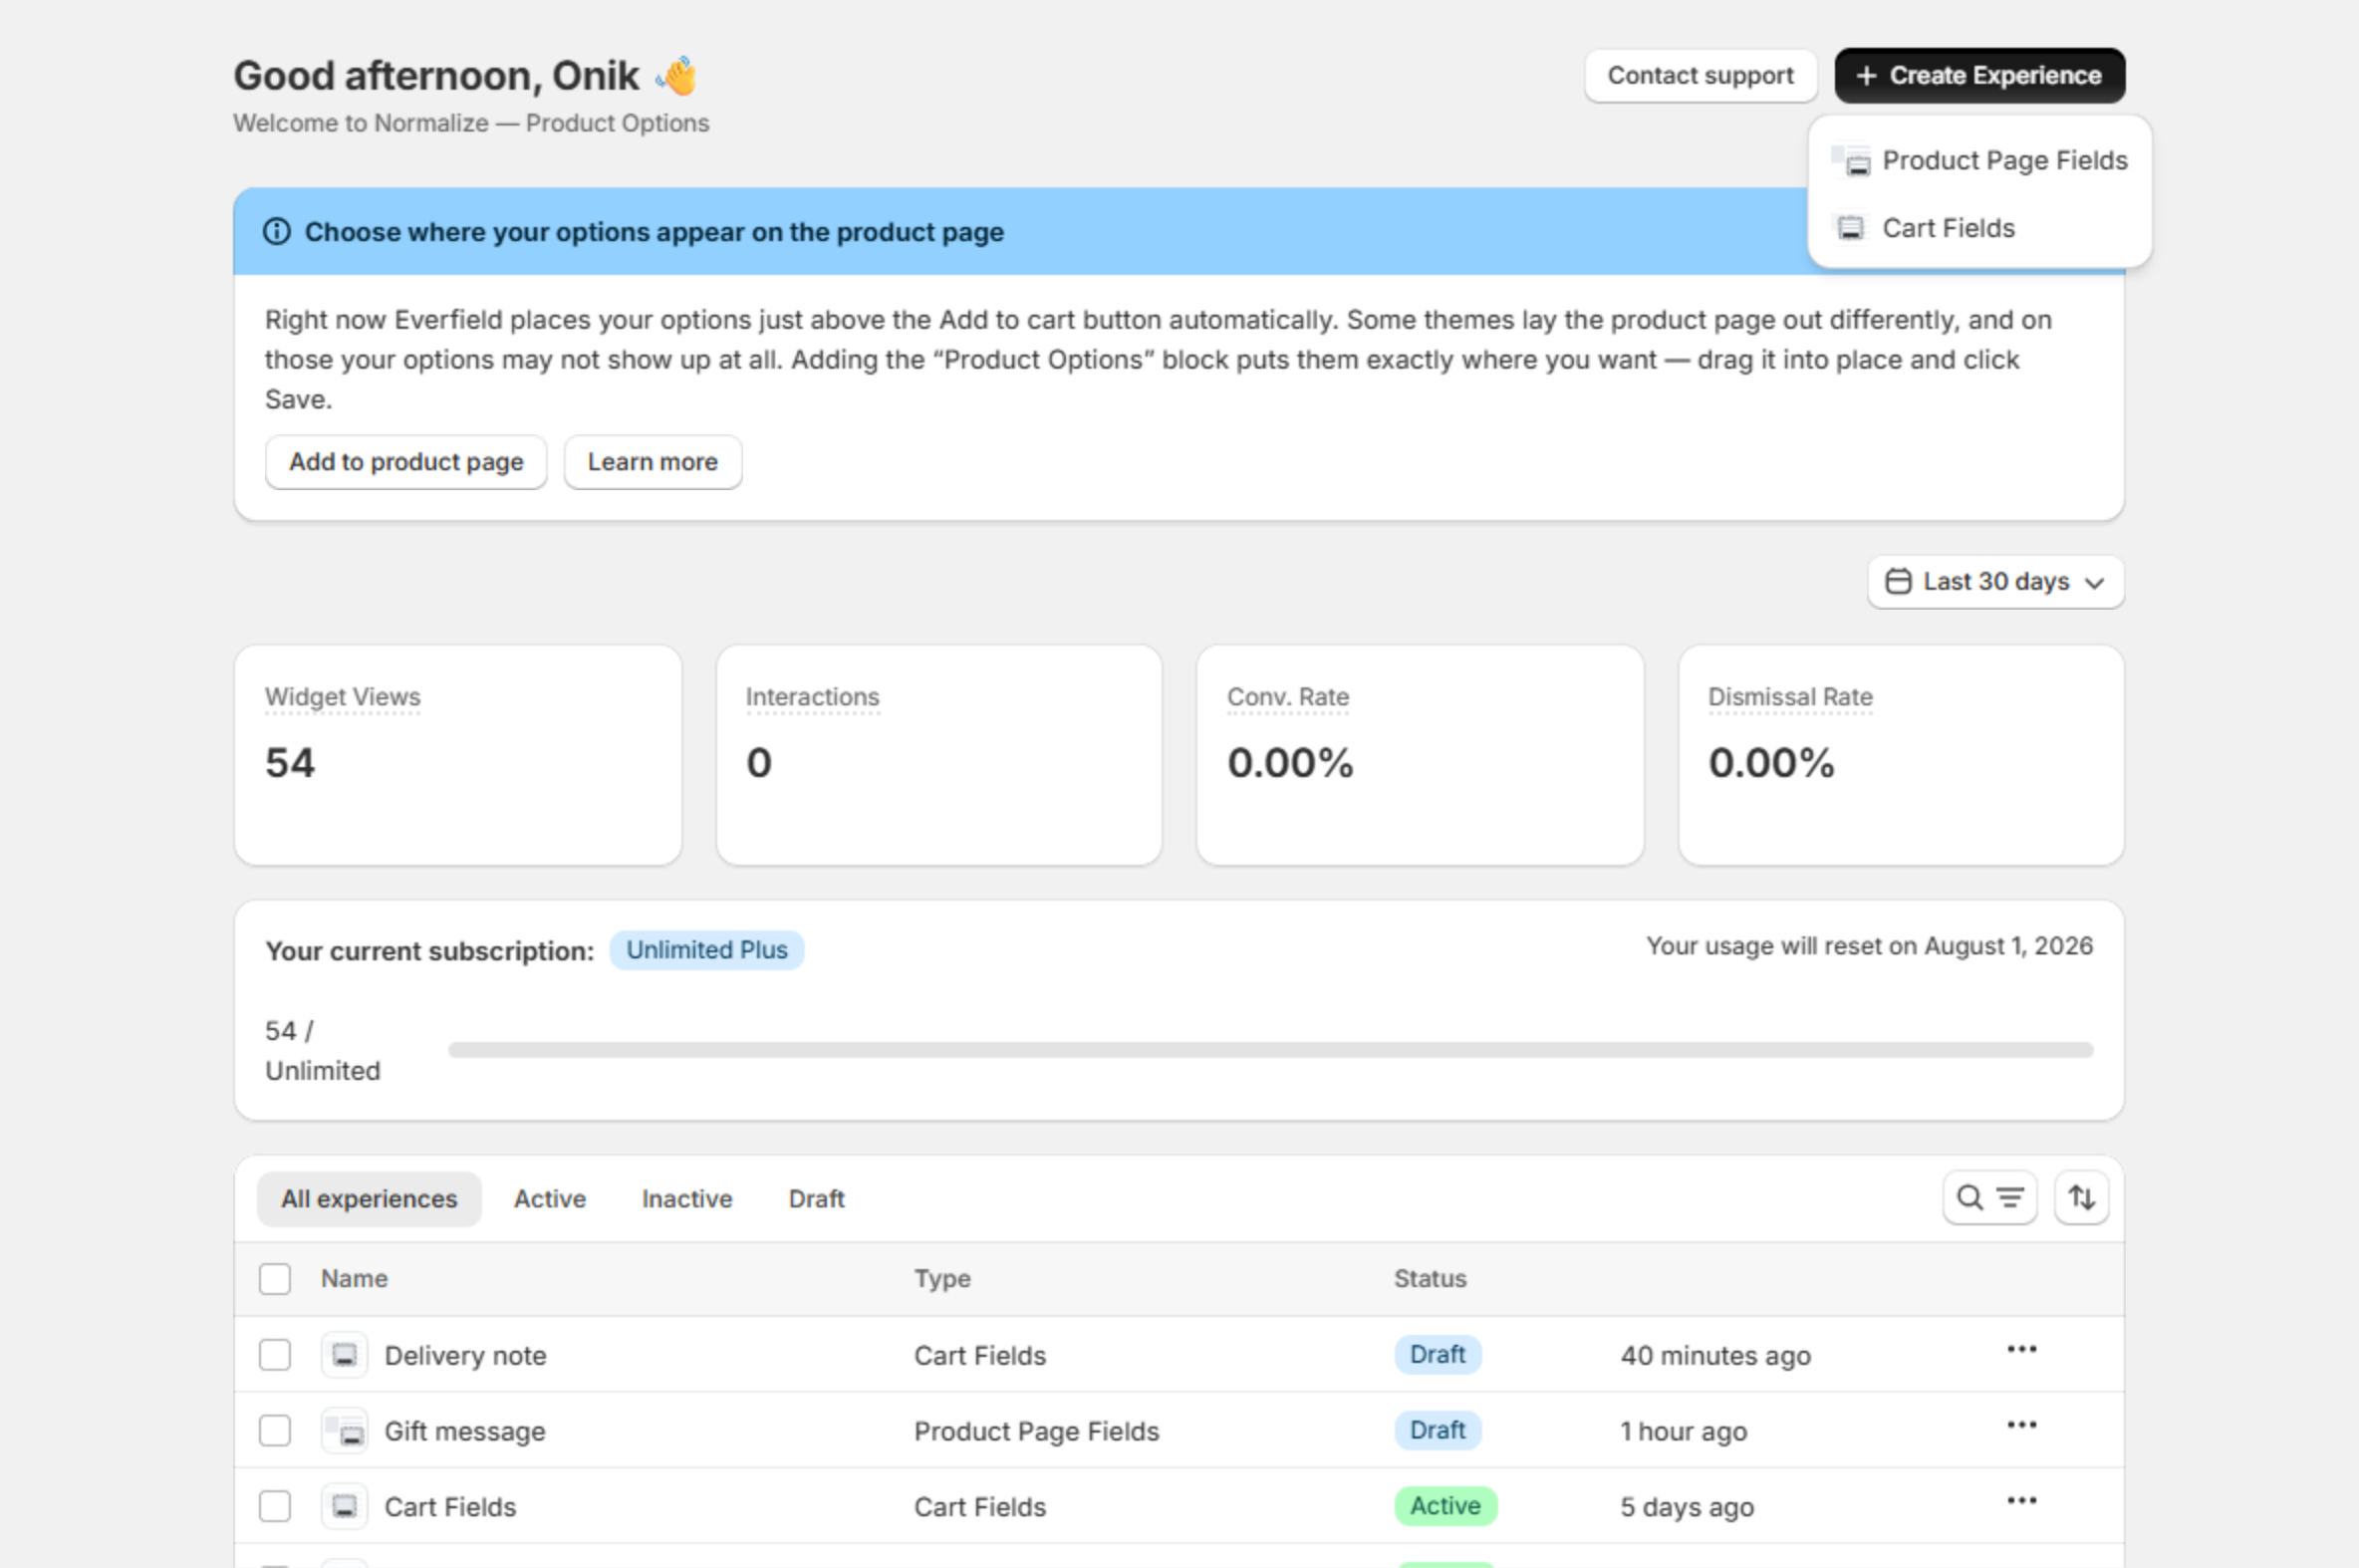
The Create experience menu — choose Cart Fields The builder opens on the Placement tab. Name the experience in the box at the top left, for example
Delivery note.Open the Fields tab. A new experience starts with one field. Expand it, pick a Field type, and set the Label to the wording your customer should see. Add more fields with Add — up to 20.
Choose the label carefully before you go live. The label is used verbatim as the key on the order, so renaming it later changes what your orders are keyed on.
Click Save, then Publish. Saving on its own does not put the experience live — the badge next to the name reads Published once it is.
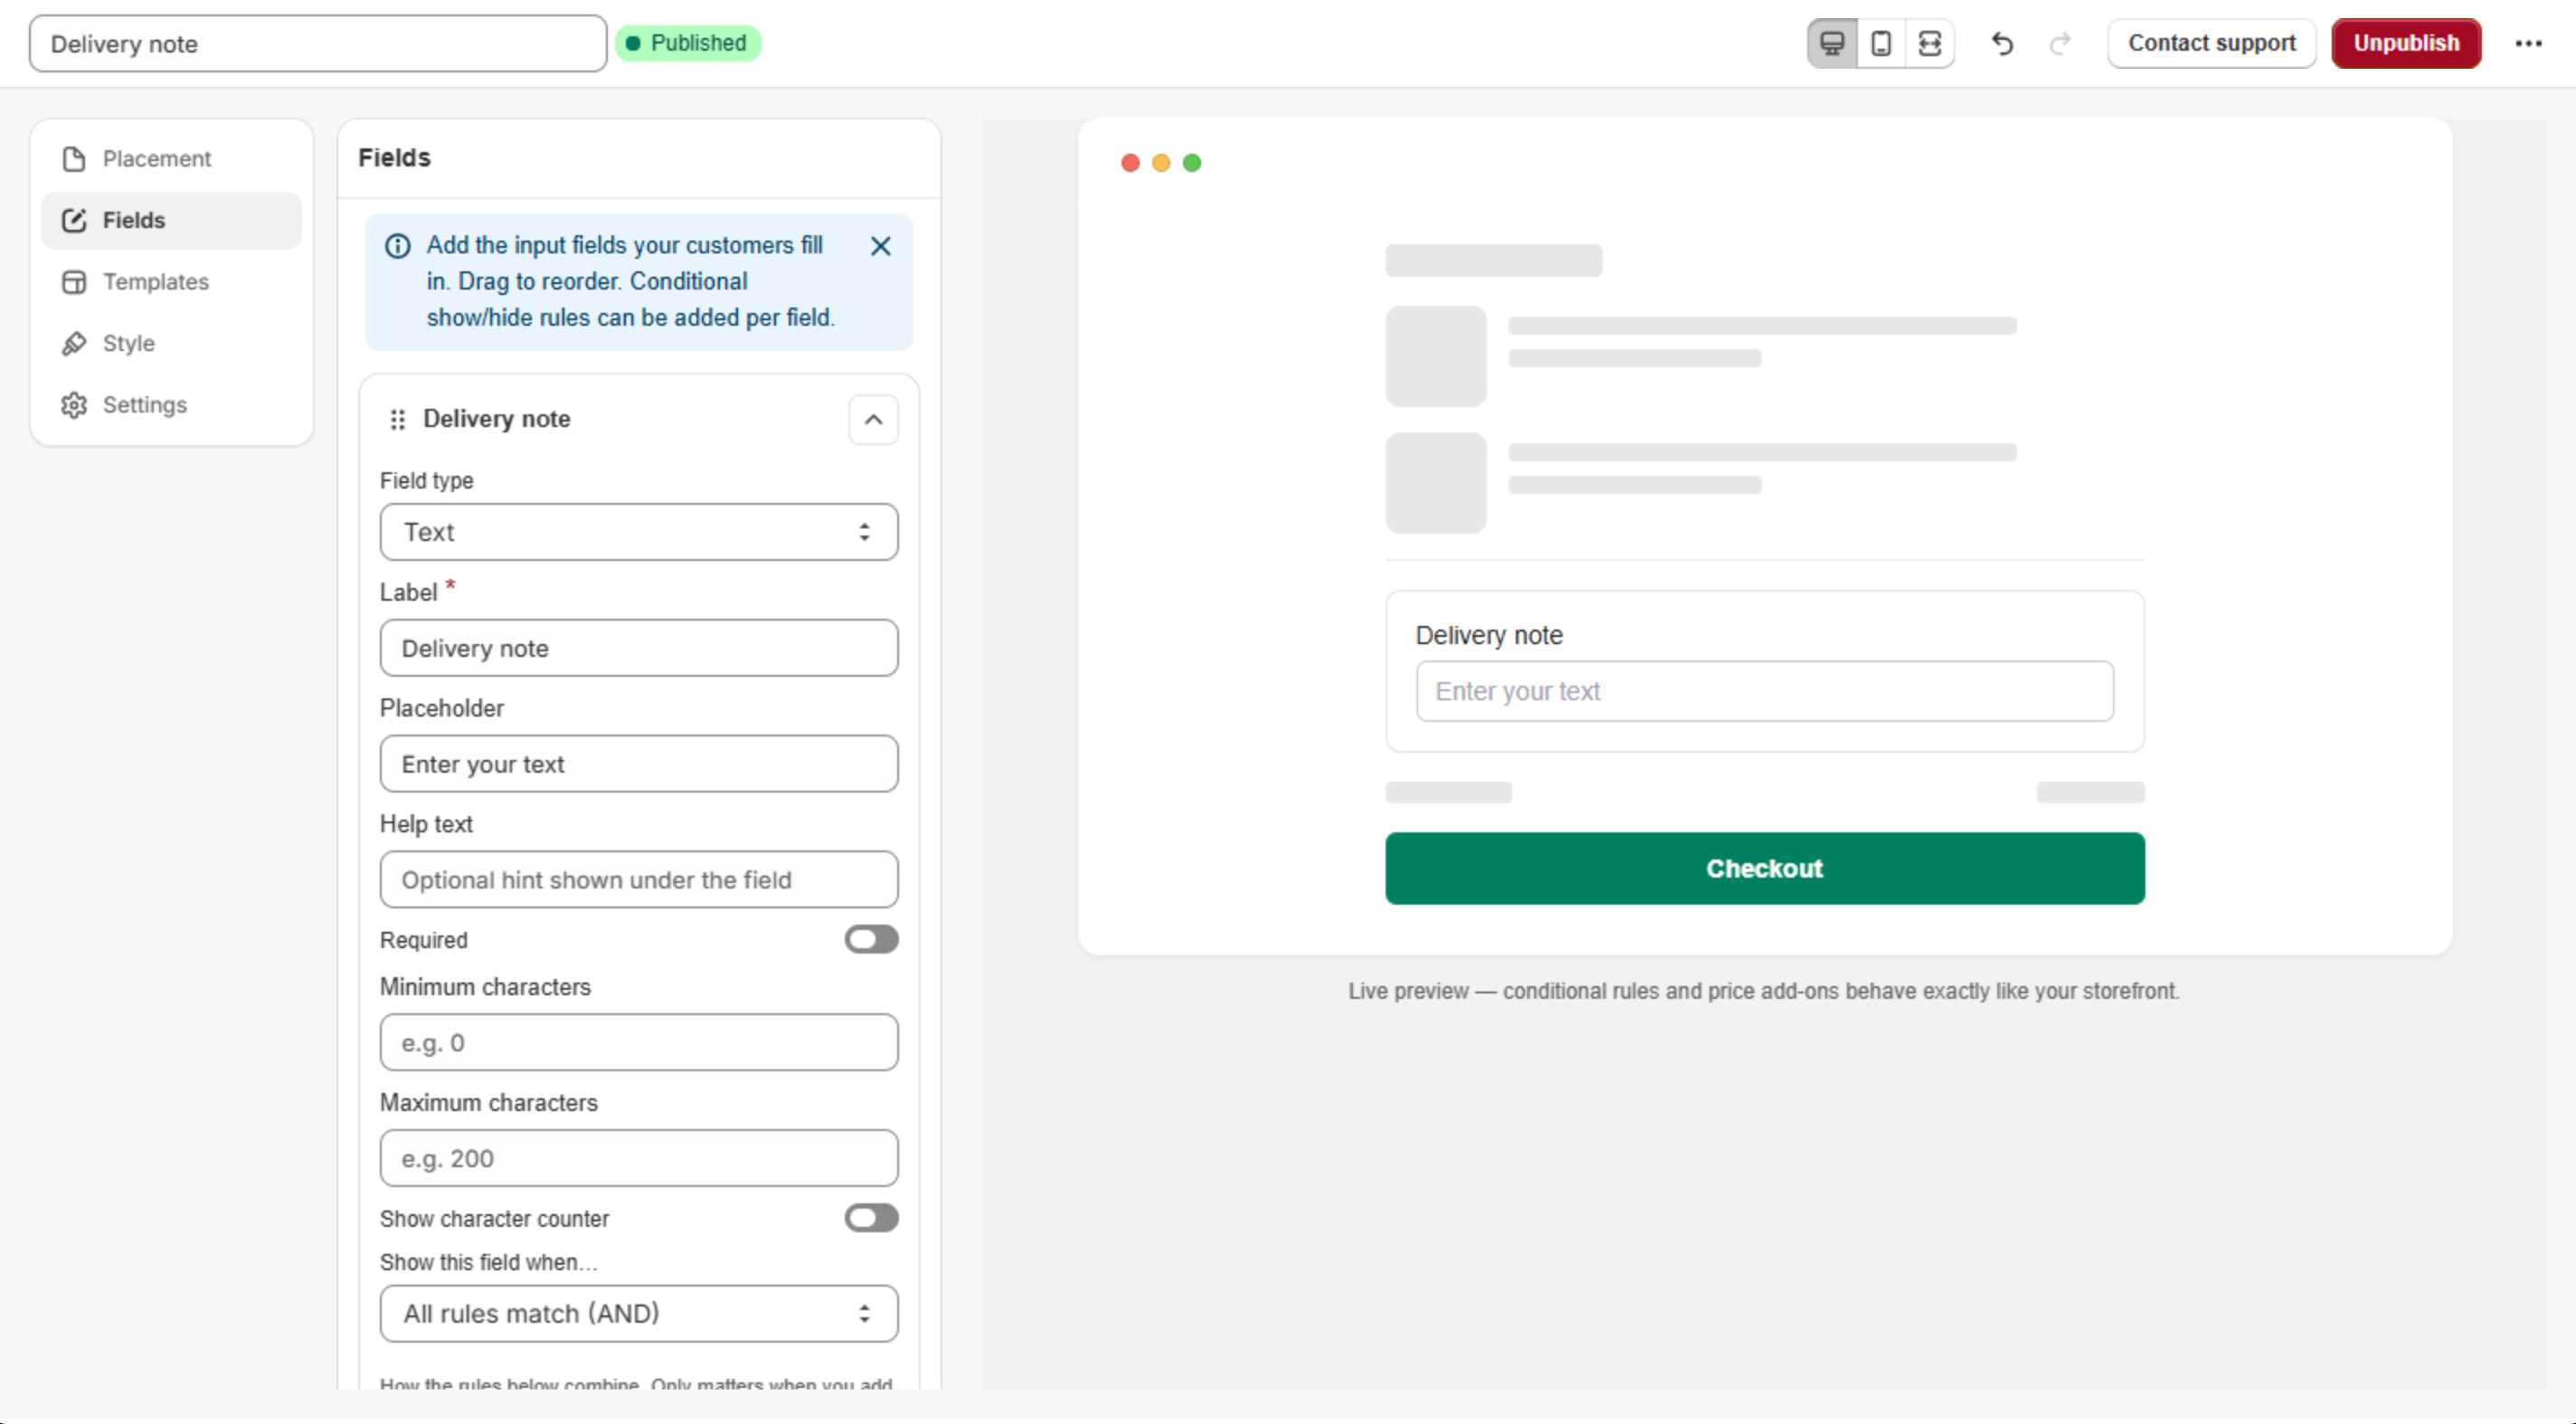
A published cart experience with one text field Add any product to your cart and open the cart page. Your fields appear above the checkout button.
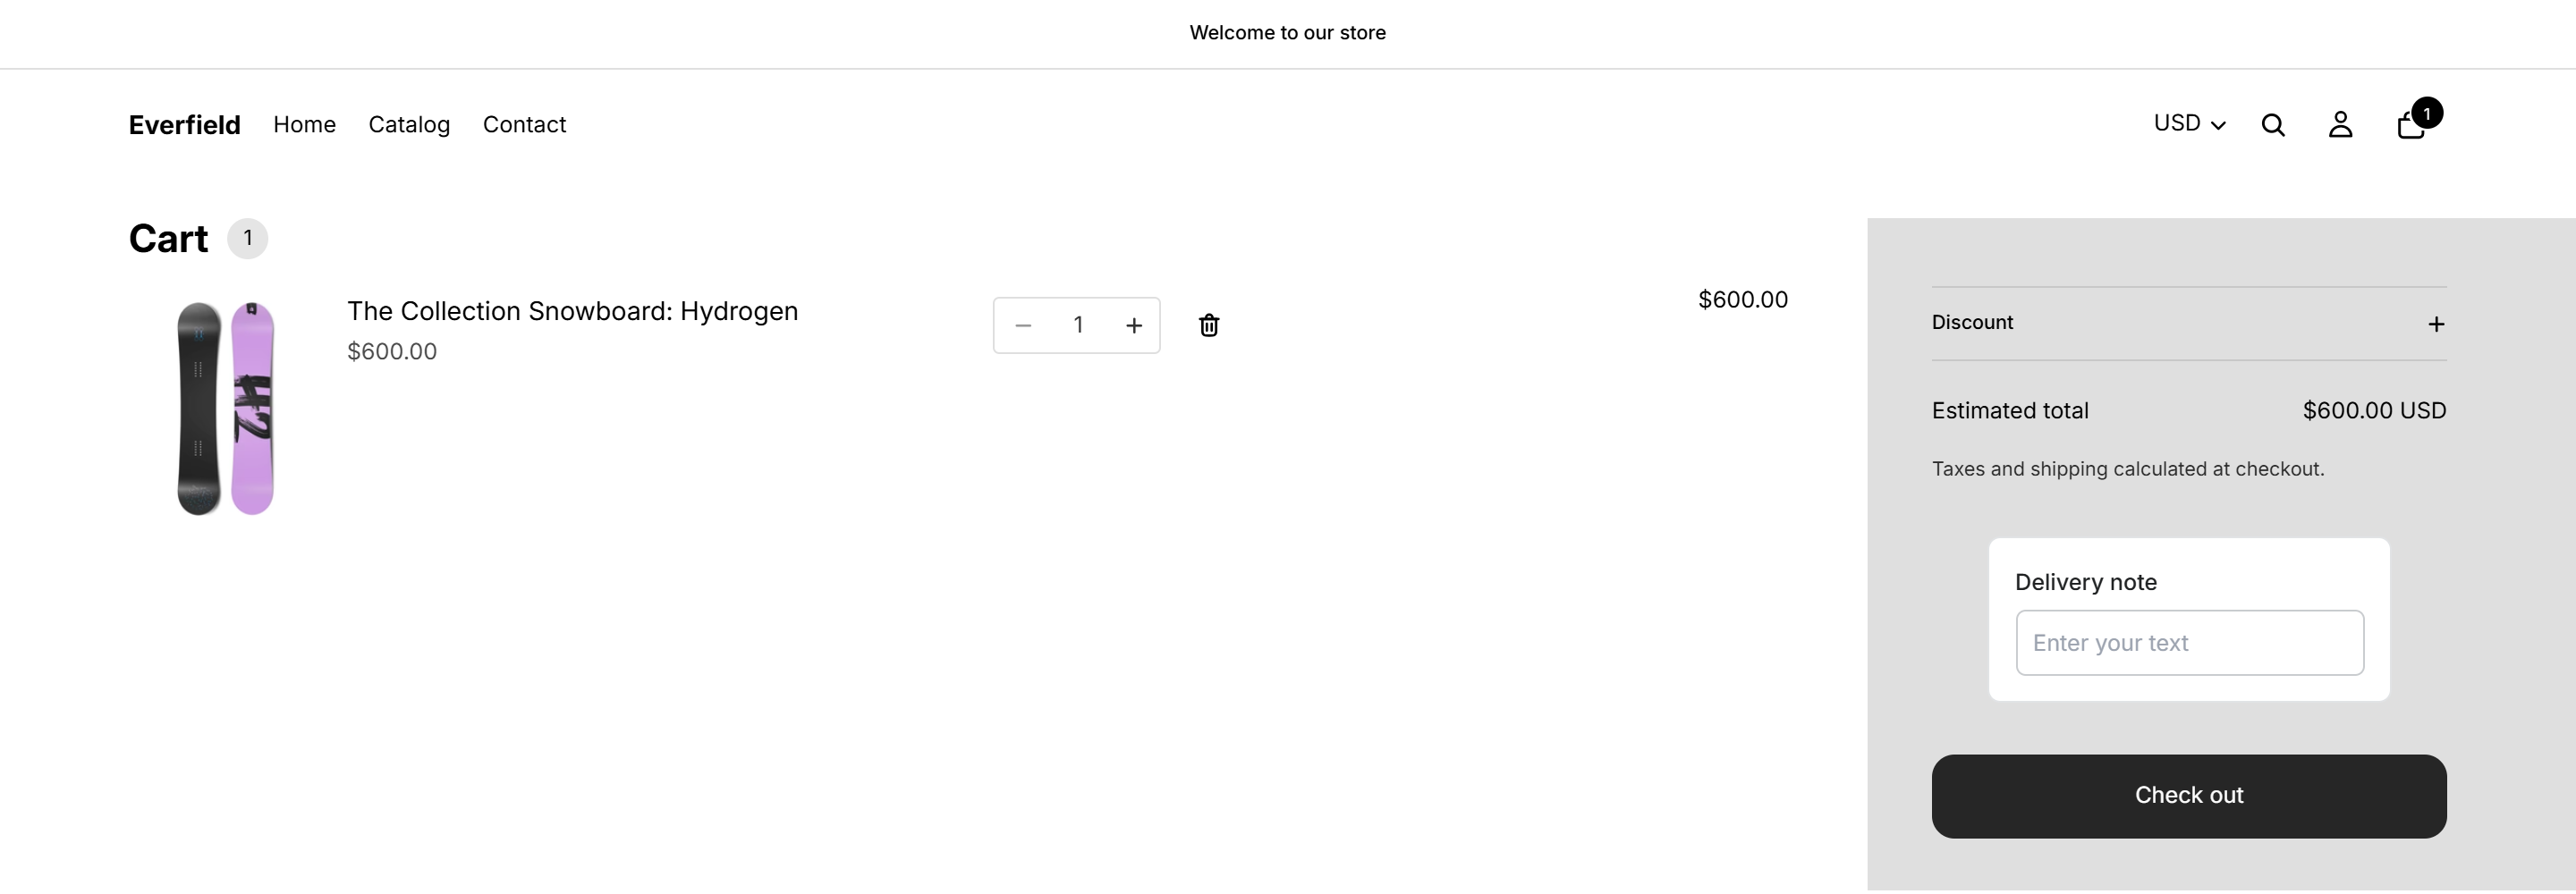
The published field on the storefront cart
The widget has no save button. Values are written to the cart roughly 400 ms after the customer stops typing, and again when they click the checkout button. That click also runs validation first — if a required field is empty or an image upload is still in flight, the click is blocked and the error message shows instead. The form also remembers what is already saved on the cart: a customer who filled the fields earlier — on the cart page or in the drawer — sees their answers prefilled rather than a blank form.
Only one cart experience renders at a time. If you publish two, customers see the first one that matches; there is no stacking or ordering control.
Required fields and the add-to-cart popup
Some themes offer a checkout button in a place the cart fields cannot render — most commonly themes in the Dawn family with the cart type set to Notification, where adding to cart opens a small popup with its own Check out button. Everfield does not let that button skip your required fields: if the cart is still missing an answer to a required field, the customer is taken to the cart page instead, where the fields scroll into view and the missing ones are highlighted in red.
The detour is deliberately conservative:
- It only happens while a required field is unanswered. Everfield first checks the answers already saved on the cart, so customers who filled everything in go straight to checkout untouched.
- Experiences whose fields are all optional never intercept anything.
- A required field shown only by a conditional rule never triggers it either.
- It happens at most twice per browser session, and never on the cart page itself.
See Required fields and validation for what the customer sees.
Let Everfield find the checkout button
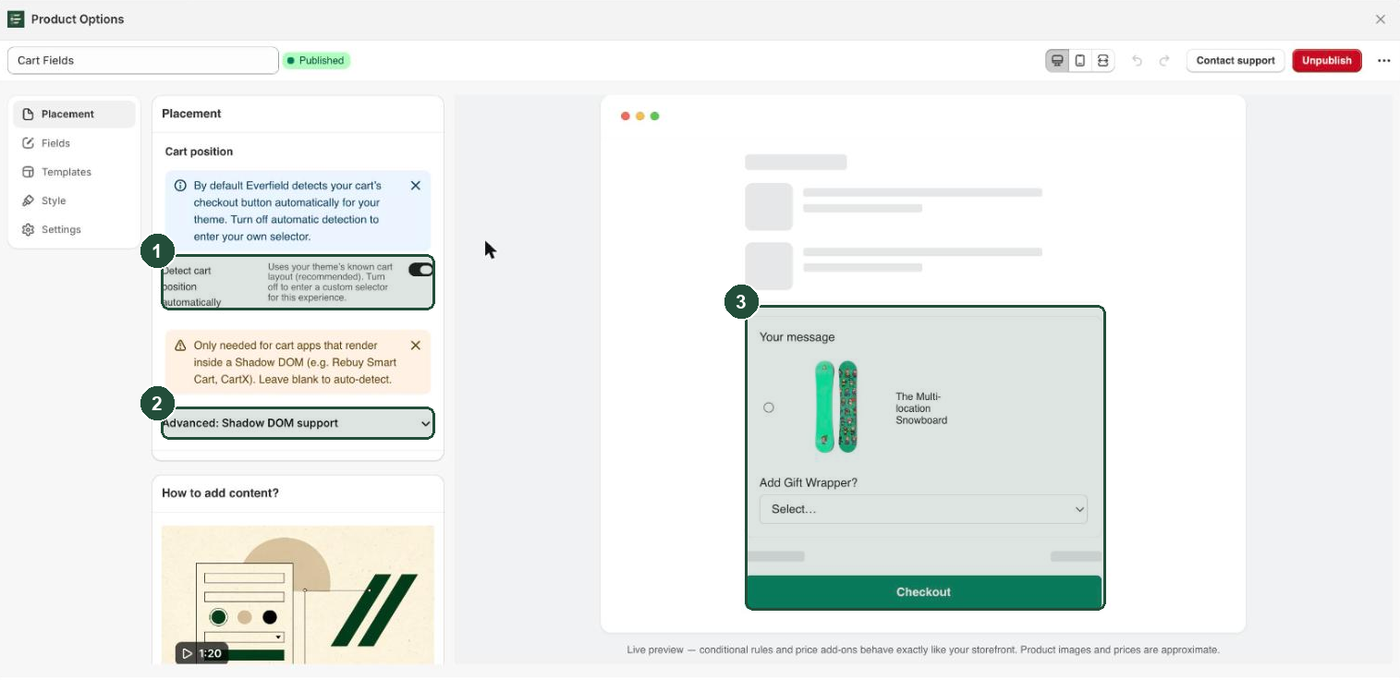
By default Everfield works out where your theme puts its checkout button and inserts the fields immediately above it. On a Dawn-style theme the anchor is the container that holds the cart buttons, so the fields sit just above the whole checkout block; with a custom selector they sit directly above the button you name. On the Placement tab, the Cart position section carries this note:
By default Everfield detects your cart’s checkout button automatically for your theme. Turn off automatic detection to enter your own selector.
The toggle Detect cart position automatically is on by default, with the help text "Uses your theme’s known cart layout (recommended). Turn off to enter a custom selector for this experience." Leave it on unless the fields land somewhere you do not want them.
Automatic detection reads from a per-store list of themes. Everfield builds that list by itself the first time you open the app, and refreshes it whenever its theme library is updated — so the page is normally already populated. To see it, open Cart selectors in the left nav: it lists each installed theme with the columns Theme, Role, Match and Cart anchor. There is one button, Sync theme selectors, for after you switch or update a theme.
- Match shows Matched when the theme is in Everfield's library, and Default position when it is not. A Default position theme still gets a position — a common Dawn-style one — which may or may not suit that theme.
- Cart anchor shows the selector the fields will be inserted above.
- The footer shows Last synced: with a date, or Never.
Run Sync theme selectors after you switch themes or update one. A successful run shows the toast Theme selectors synced. If a theme is not recognised, the page also shows a warning banner titled Some themes aren’t in our library yet naming the themes concerned.
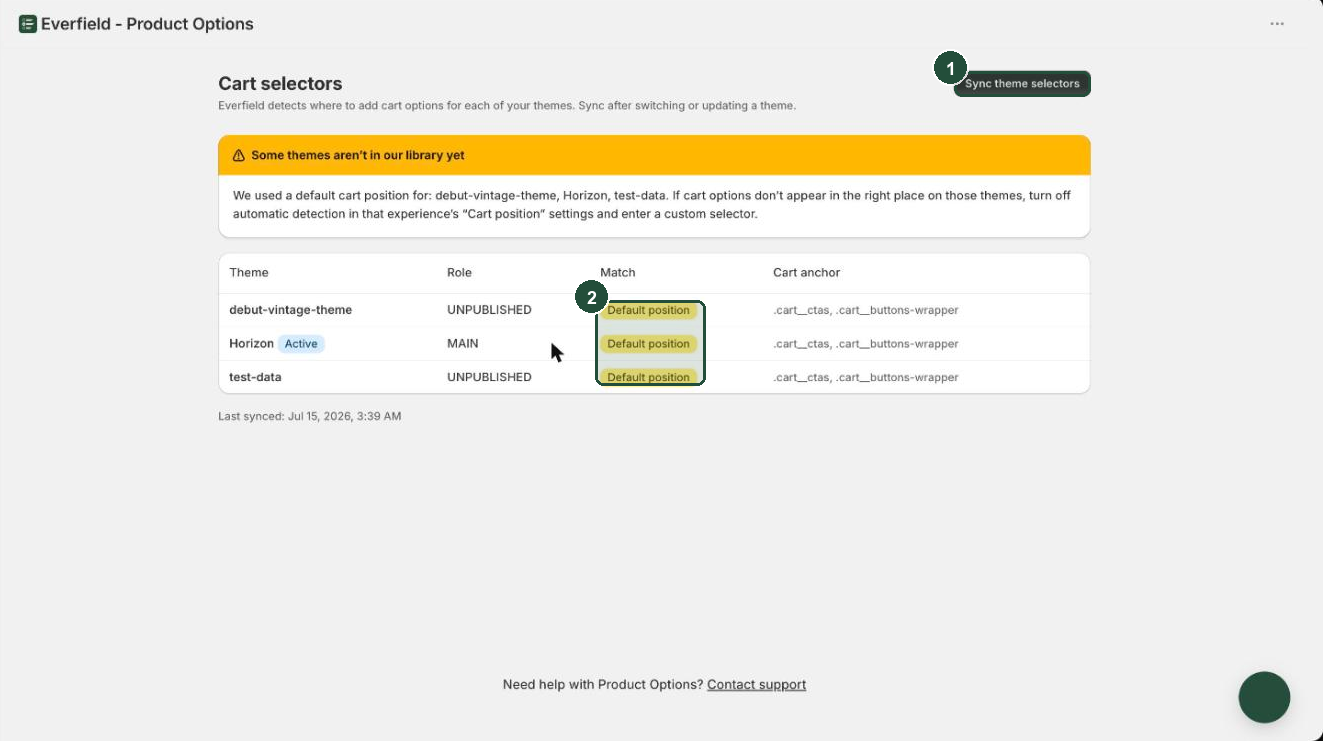
The Cart selectors page only detects and reports. There is nothing to fill in there — the position setting itself lives on the experience, on its Placement tab.
Enter your own selector
If the fields land in the wrong place, override the detection on that experience:
- Open the experience and go to the Placement tab.
- Turn Detect cart position automatically off.
- Fill in Checkout button selector — "CSS selector of the checkout button. The widget appears above it." The placeholder shows the shape expected:
.cart__checkout-button. - Click Save, then Publish again.
To find the selector, open your cart, right-click the checkout button and choose Inspect. Use the button's class (with a leading dot) or its name attribute, for example button[name="checkout"]. If you are fixing a slide-out drawer, open the drawer first and inspect the button inside it — that is often a different element from the one on the /cart page.
One thing to watch: if you turn automatic detection off and leave Checkout button selector empty, Everfield has nothing to position against and the fields do not appear at all.
Cart drawers that use a Shadow DOM
Some cart apps render their drawer inside a Shadow DOM, which hides it from an ordinary CSS selector. Everfield supports this for open shadow roots, which covers cart drawer apps such as Rebuy Smart Cart and CartX.
The setting lives on the Placement tab in a collapsed section titled Advanced: Shadow DOM support, whose banner reads "Only needed for cart apps that render inside a Shadow DOM (e.g. Rebuy Smart Cart, CartX). Enter the selector of the element hosting the shadow root — without it the fields cannot mount inside that cart." Inside it is one field, Shadow host selector — "CSS selector of the element that hosts the Shadow DOM." — with the placeholder rebuy-cart. This selector is required for shadow-DOM carts: left blank, Everfield only searches the normal page and the drawer stays empty.
The Shadow host selector field only appears once Detect cart position automatically is off. That means using it also commits you to filling in Checkout button selector yourself.
If your cart app uses a closed shadow root, Everfield cannot reach inside it and the fields will not mount there.
Editing an answer already on a cart line
A cart experience has a second behaviour that switches on by itself. When a product already in the cart carries an answer whose key matches one of your cart experience's field labels — usually because a product page experience uses the same label — Everfield shows one prefilled editor per matching line, headed by that product's title, instead of a single order-level form. Edits then save back to that specific cart line, about half a second after the customer stops typing, rather than to the cart as a whole.
This is useful: it lets a customer correct an engraving or a gift message from the cart without removing the item. It is also automatic, so you cannot turn it off. Three consequences worth knowing:
- Give your cart fields their own labels if you want cart answers kept separate from product page answers. Matching labels is what triggers per-line mode.
- Because matching is on the label text, renaming a label after publishing breaks the prefill for carts created under the old label.
- The per-line editors do not validate and do not guard the checkout button. A required field is only enforced by the ordinary order-level cart form; while a cart is in per-line mode, an empty field will not block checkout.
Troubleshooting
Nothing appears on the cart at all. Check whether Detect cart position automatically is off with an empty Checkout button selector — that combination gives Everfield nothing to position against. Either turn detection back on, or fill the selector in. Also confirm the experience is live: the badge in the builder reads Published, and the same experience shows as Active in the dashboard list. Saving is not publishing.
The fields show, but in the wrong spot. Open Cart selectors and look at the Match column for your live theme. Default position means your theme is not in the library and Everfield fell back to a common Dawn-style anchor. Turn off automatic detection on the experience and enter your own Checkout button selector.
The fields do not show in the slide-out cart. Some drawers are built after the page has loaded. Everfield re-checks as the page changes, so give it a moment after opening the drawer. If they never appear, the drawer's checkout button is not the one Everfield found — set Checkout button selector to the button inside the drawer. If the drawer comes from a cart app that renders in a Shadow DOM, set Shadow host selector too.
They worked, then stopped after a theme change. Automatic detection is per theme. Open Cart selectors, click Sync theme selectors, then check the new theme's Match badge. Last synced: should already show a date, because Everfield syncs automatically when you open the app — if it reads Never, that automatic sync failed; run it manually before troubleshooting anything else.
Product targeting on a cart experience behaves oddly. Product, collection and tag rules need a product in context. They apply when a cart drawer opens on a product page, and are skipped entirely on the /cart page. On cart experiences the rules that hold everywhere are Device visibility and country targeting — Hide in these countries while Show in all countries is on, or Show only in these countries while it is off. (All targeting rules need the Advanced plan or Unlimited Plus.)